CQ VK9! CQ VK9! Why didn’t I think of that?
The Raspberry Pi is a fantastic general purpose single board computer, and at $35 (or often less) with an incredibly diverse software ecosystem, I think its value proposition is very difficult to beat. But sometimes, it’s just not enough. So it is with FT8, the hot new digital mode that it seems like everyone is talking about. I used WSJT-X on the Pi for JT65 QSOs for a while, and all was well. But when I tried to use it for FT8, I found that on a busy band the decodes took several seconds too long, and the new 15 second window had already started by the time the previous window’s transmissions were decoded. It was clear that the Pi really didn’t have enough “oomph” to manage WSJT-X, a VNC server, and the other bits and bobs I had running. So I took a look around for a more powerful SBC and found the Tinker Board (shameless Amazon link) from Asus. Sporting a quad-core 1.8 GHz ARM-based RK3288 SoC, the Tinker Board handily beats the Pi 3’s 1.2 GHz BCM2837. And, it shares the Pi’s physical form factor, meaning you can use the same cables, cases, etc. I ordered one for $60 and got it from Amazon the same day.
The hardware specs for the Tinker Board pretty much sweep the floor with the Pi (at about twice the price, of course) but it comes with a major downside: the Tinker Board ecosystem is nowhere near as well-developed as the Pi’s. Of course, the Pi has several years’ head-start, so it will be interesting to see where this all goes over time. Anyhow, the Tinker Board’s vendor supported OS goes by the name of TinkerOS (as opposed to the Pi’s Raspbian), and it is a closely related but not identical flavor of Debian Linux. Getting WSJT-X running on it was surprisingly not too difficult for me, but I work with Linux for a living, and even so I found that some experimentation was necessary to get it all going. So I thought I would share my findings in case others want to follow along.
I started with a 32 GB micro SD card (honestly, 8 GB would be fine but I happened to have a spare 32 lying around. I then downloaded TinkerOS 1.8 and burned it onto the SD card with Etcher. I plugged in the micro USB power cord and… nothing happened. The red light on the board blinked once and then went out. One thing you have to keep in mind about these boards is that they can draw a lot of current, and maybe micro USB wasn’t the best decision ever for power supply. Well in any case, I substituted an old Apple iPad 10 watt power supply and the Tinker Board was happy (the board doesn’t come with a supply of its own, but if you have a spare 10 watt supply you should be fine, or you can purchase a power supply marketed especially for the Tinker Board). You’ll also need to connect an HDMI video display, a keyboard and mouse for initial setup. It might be possible to do all the basic configuration steps “blind,” but life is only so long. After initial configuration, you can ditch everything but the Tinker Board and run it totally headless if you so desire, as I do.
When the Tinker Board boots up, it enters a graphical desktop environment as the “linaro” user with password “linaro.” My first thought was to change the default runlevel to multi-user no gui (my standard configuration for any server), but as we’ll see that didn’t work out. Within the GUI I made the following configuration changes:
- I disabled “Power Manager” and “Screen Locker” under Start->Preferences->Desktop Session Settings.

If you don’t disable these, all sorts of weird stuff happens when you try to use VNC later on. If you don’t plan on accessing your Tinker Board over the network, you can leave these as-is. Also note that, bizarrely, the network doesn’t get started unless you log in to the GUI (see that checkbox?). I found this out the hard way.
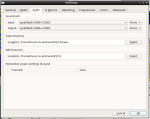
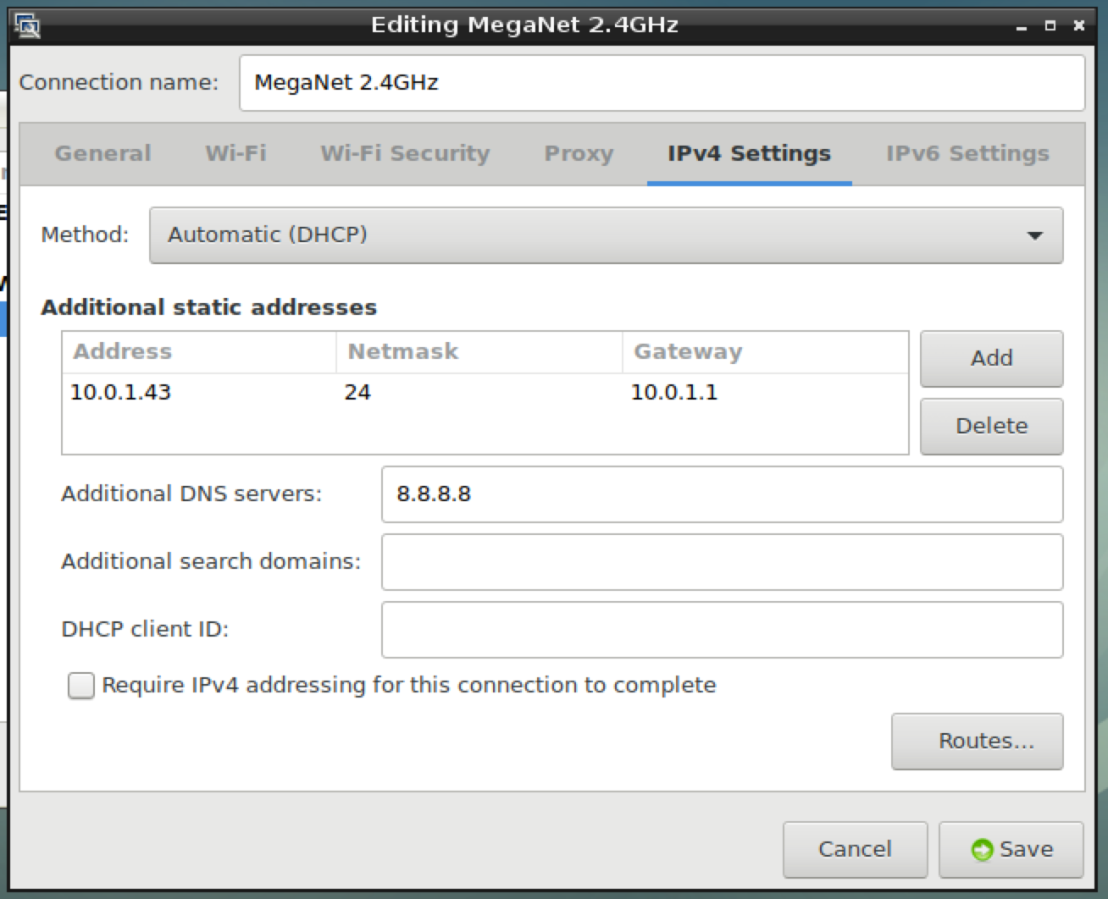
- I configured my Tinker Board’s wifi to use a static IP address, because I don’t feel like playing Whac-a-Mole every time the board reboots. First, you need to connect to wifi, which is easy enough, just click on the signal strength bars icon in the lower right system tray and choose your network, then enter the password. After you’re connected, go to Start->Preferences->Network Connections and choose your wifi connection (or ethernet, if you prefer), then the IPv4 Settings tab, and edit as appropriate. Here’s my configuration:
- Adjust your monitor settings, if desired. I set mine to 800×600 because I plan to use my Tinker Board entirely via VNC, not with a local monitor. Just go to Start->Preferences->Monitor Settings.
- (Optional) I am using my FTDX-3000’s built-in sound card, which is fully supported by TinkerOS with no additional drivers required. For some reason TinkerOS does not configure its output at 100% volume by default, and it is thus impossible to achieve full modulation. To fix this, I just go to Start->Sound & Video->PulseAudio Volume Control, select the Output Devices tab, scroll down to find the Audio CODEC device, and set it to 100%:

If you’re using a different sound card, your results may vary. This is called a “Tinker Board,” after all…
At this point, I’m done with the GUI as experienced through a directly attached monitor. I did a “sudo poweroff,” and once the board powered down, I disconnected the monitor, keyboard and mouse, and threw them away (OK, fine, I just put them back in the garage). If you want to use a keyboard, mouse and monitor that are attached to the board and operate in a fixed position, that’s cool too, but I am mobile and I like remote control. From here on out on the installation, it’s all CLI.
I moved the board to its operating position and plugged it back in to power. Once it booted up, I connected over wifi via ssh using the linaro/linaro user. If you still have a monitor and everything attached, you can also go to Start->System Tools->XTerm. You could definitely create your own user if you prefer, and normally I would, but to KISS I am just using linaro now. Be sure to change the password or everyone will pwn your board and mock you, you n00b.
Here’s the commands I run to get everything installed:
sudo apt-get update
sudo apt-get upgrade
Nothing too surprising here, just the boilerplate update. Be aware, if you’re doing this much later than me, patches that are installed by this process may send you down your own novel path! During the upgrade process, I got asked a couple of questions about my keyboard that I answered as follows. Obviously, you must choose what’s right for you.


sudo apt-get install x11vnc
x11vnc -storepasswd
OK now, a word about this. You don’t have to do this step if you’re not planning to access the board remotely. I first tried using conventional VNC servers, such as Tight VNC, Tiger VNC, and some others, and they all worked in the sense that I could see the screen and use my mouse and all. They did not work in the sense that I could not use WSJT-X; every time I tried to start WSJT-X under VNC the app would fail to start and I would get the error message, “XKEYBOARD extension not present on the X server.” A fair bit of digging around revealed that, apparently, Qt 5 (the interface library used by WSJT-X) requires this XKEYBOARD extension, and none of the VNC servers set it. Furthermore, Qt 5 doesn’t consider it their problem so they won’t fix it, and the VNC server authors don’t seem to be interested in fixing it either. Thanks, guys. The only workaround I could figure out was x11vnc, which shares your “real” desktop session over VNC; hence, my earlier comments about not changing the default runlevel. Your “real” desktop session shouting into the HDMI void supports this XKEYBOARD thing, whatever it is, I guess, so it all works. There may be more graceful ways to solve this problem that involve finding a non-braindead VNC server, but hey, this is tinkering and we’re having fun, dammit.
x11vnc -storepasswd is optional, but if you don’t do it, your screen will be shared with no password — not very bright. So be sure to do it. It creates the ~linaro/.vnc/passwd file that my script below expects. This password will be sent unencrypted over the wire so I suggest you choose something other than your banking password.
To make it easy to start x11vnc, I created a simple bash script called “startvnc.” I just need to run it once each time the board reboots (or at least, every time you log into the GUI). Honestly I don’t see any reason you couldn’t put it right into /etc/rc.local but I’m an old-fashioned kinda guy, I like to know when my jankery is starting up.
Here’s what I did to create my script:
sudo vi /usr/bin/startvnc
sudo chmod 755 /usr/bin/startvnc
And here’s what I put in it:
#!/bin/bash

/usr/bin/x11vnc -display :0 -rfbauth /home/linaro/.vnc/passwd -forever > /dev/null 2>&1 &
All I need to do is run “startvnc” once when the board reboots, and after that, my screen session is shared via VNC. Like I said, you could also put it in /etc/rc.local, I think.
sudo apt-get install libgfortran3 libqt5serialport5 libqt5printsupport5 libhamlib2
wget http://www.physics.princeton.edu/pulsar/K1JT/wsjtx_1.8.0-rc2_armhf.deb
sudo dpkg -i wsjtx_1.8.0-rc2_armhf.deb
While running dpkg, I got an error message as follows:
linaro@linaro-alip:~$ sudo dpkg -i wsjtx_1.8.0-rc2_armhf.deb
Selecting previously unselected package wsjtx.
(Reading database ... 50673 files and directories currently installed.)
Preparing to unpack wsjtx_1.8.0-rc2_armhf.deb ...
Unpacking wsjtx (1.8.0-rc2) ...
dpkg: dependency problems prevent configuration of wsjtx:
 wsjtx depends on libreadline6 (>= 6.0); however:
 Package libreadline6 is not installed.

dpkg: error processing package wsjtx (--install):
 dependency problems - leaving unconfigured
Processing triggers for desktop-file-utils (0.23-1) ...
Processing triggers for mime-support (3.60) ...
Errors were encountered while processing:
 wsjtx
So the problem here is, libreadline6 is required by the WSJT-X package, but the TinkerOS repos only seem to have libreadline5 and libreadline7… go figure. Anyway, WSJT-X doesn’t really seem to require it. To make apt-get stop whinging about it forever more, I just edited the dpkg status file with sudo vi /var/lib/dpkg/status and then searched for libreadline6. The only place it was present was under the wsjtx package. I removed that entry, then saved. Voilà, no more complaints. P.S. I do not guarantee this won’t brick your system, so be careful.
To actually use WSJT-X, just use VNC to connect to the Tinker Board on port 5900 (screen 0). If you need help with this, I’ll write another article that shows the VNC client setup. If you’re using an old-fashioned real screen, skip the VNC step. Now, go to Start->System Tools->XTerm. If you haven’t run startvnc yet, do so now (again, if you’re using VNC). Now, just type wsjtx and you should get the lovely application we’ve all so quickly become smitten with.
Up to this point, everything we’ve discussed has been pretty generic. Now I’m going to cover how I configured WSJT-X to work with my FTDX-3000. You will need to follow very similar steps to use it with your own rig, so adjust accordingly. BTW, I must say the digital mode support for the FTDX-3000 is pretty kick-ass; while the functionality is undocumented and Yaesu support even swore to me over the phone that it doesn’t exist, in fact the USB port on the back exposes both a generic sound card and a generic serial port over the same cable, neither of which requires special drivers to work with any recent Linux distro. As a result, my Tinker Board has only two cables: power from the Apple power supply, and the USB cable running to the rig.

Look ma, no cables! Well, almost. This is all that’s required for FT8 with the Tinker Board and an FTDX-3000.
Here are the configurations I use for the FTDX-3000, under File->Settings.
Additionally, I override some of the default settings on the FTDX-3000, as shown:
And finally, I adjust the Pwr menu on WSTJ-X until the ALC meter is peaking just below the end of the blue range. Note that I adjusted the sound card’s output volume above.
Final Thoughts
That’s a lot of content for one post. I can think of several improvements that will be left as an exercise to the reader for now, such as tunneling over ssh so that your session is encrypted. I will say that I use this setup remotely all the time. It works well from the couch in the living room, from my desk at work, and anywhere where I have a cell phone connection. The Tinker Board is fast and responsive even over VNC. FT8 is a lot of fun, and I can see why it’s taken off so quickly.
In the future, I will possibly write a couple of articles about how to implement that ssh tunneling I mentioned, and also how to set up VNC Viewer, which is what I’m using as my remote terminal. I have some trivial python scripts I’ve written to control the rig power and transmitter output levels, so that I can do the needful while I’m far away. I will post those to GitHub sooner or later.
Thanks for reading. Please send me any feedback you may have. 73!